What I’ve learned over the years: The ultimate guide to building a home gym
What started as a few kettlebells in a spare bedroom evolved into me literally digging out a custom gym space from the side of my house with my bare hands. Over eight years, I’ve transformed from a commercial gym devotee to someone who built their dream training space from the ground up—quite literally. Whether you’re just starting with a yoga mat or ready to break ground on your dream space, here’s what I’ve learned along the way.
Start Small, Start Smart
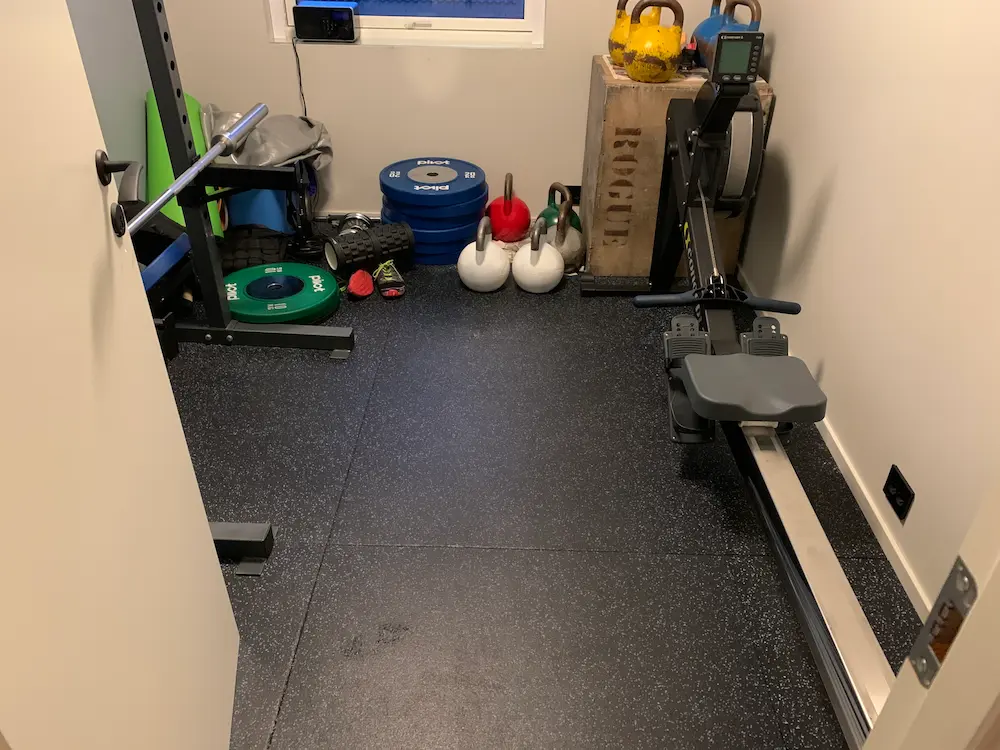
My home gym journey began in a spare bedroom, where I trained for 5 years before upgrading to a proper space. It wasn’t fancy, but it was effective. With just a barbell, some weight plates, a small squat rack, and a rowing machine on rubber flooring (to protect the floors and reduce noise), I had everything I needed. The space was tight - I had to perfect the art of the “plate shuffle,” moving weights around just to have enough room to deadlift. But those constraints taught me my most valuable lesson: consistency beats aesthetics every time. That cramped bedroom saw more genuine progress than many perfectly curated garage gyms on Instagram.
Upgrading Through Opportunity
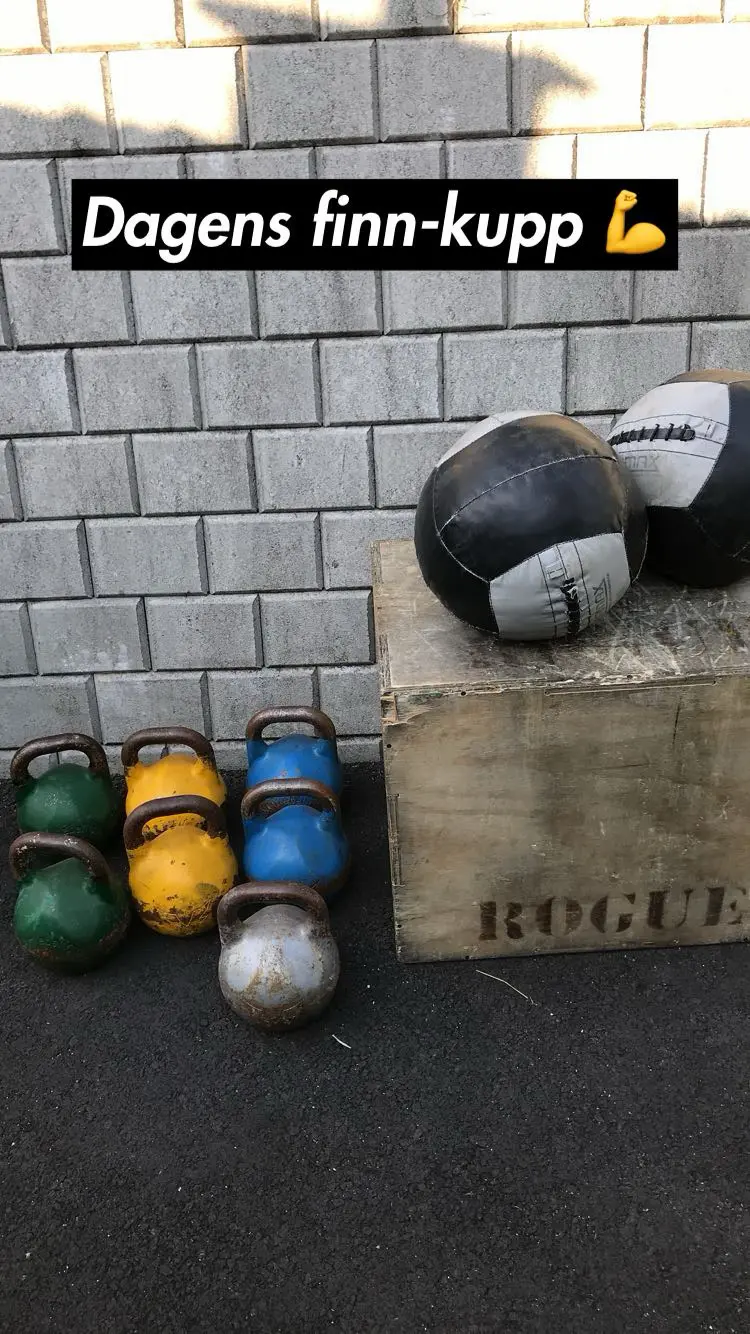
While we were renovating our home and investing in essentials like walls, flooring, and lights, I gradually improved my gym by finding deals on quality used equipment. But when a nearby CrossFit gym upgraded their equipment, I bought kettlebells, a plyo box, and wall balls at discounted prices. This phased approach helped me identify my true equipment needs while slowly building on my existing basics.
The Dedicated Upgrade: Building My Home Gym
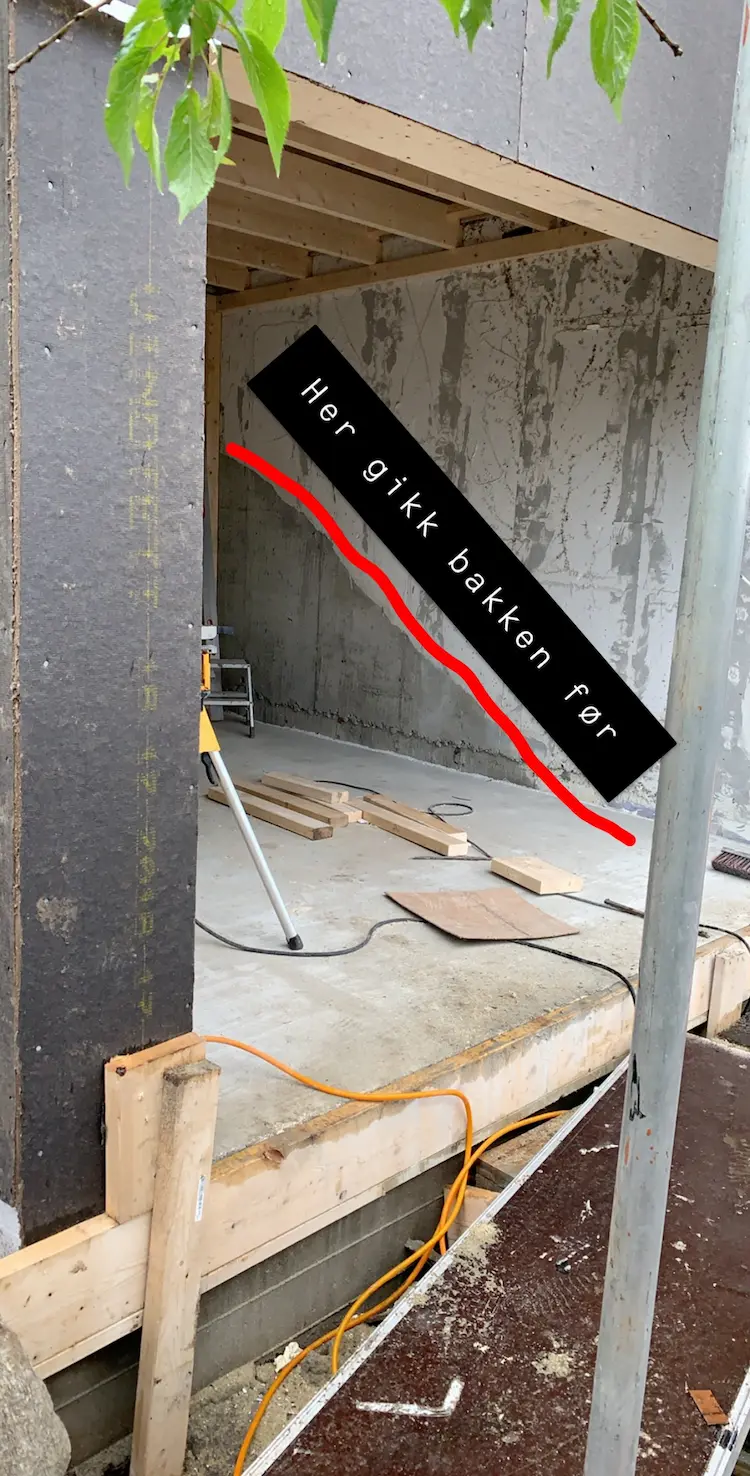
After five years of maximizing every square inch of that spare bedroom, I made a decision that my wife initially thought was crazy: I was going to dig out a dedicated gym space from the hillside next to our house. By hand. With a pickaxe, shovel and wheelbarrow. For over half a year, my “workouts” consisted of moving dirt and rocks. I gained some of the worst blisters of my life and discovered muscles I didn’t know existed, but watching that space take shape was more satisfying than any PR I’d ever hit.


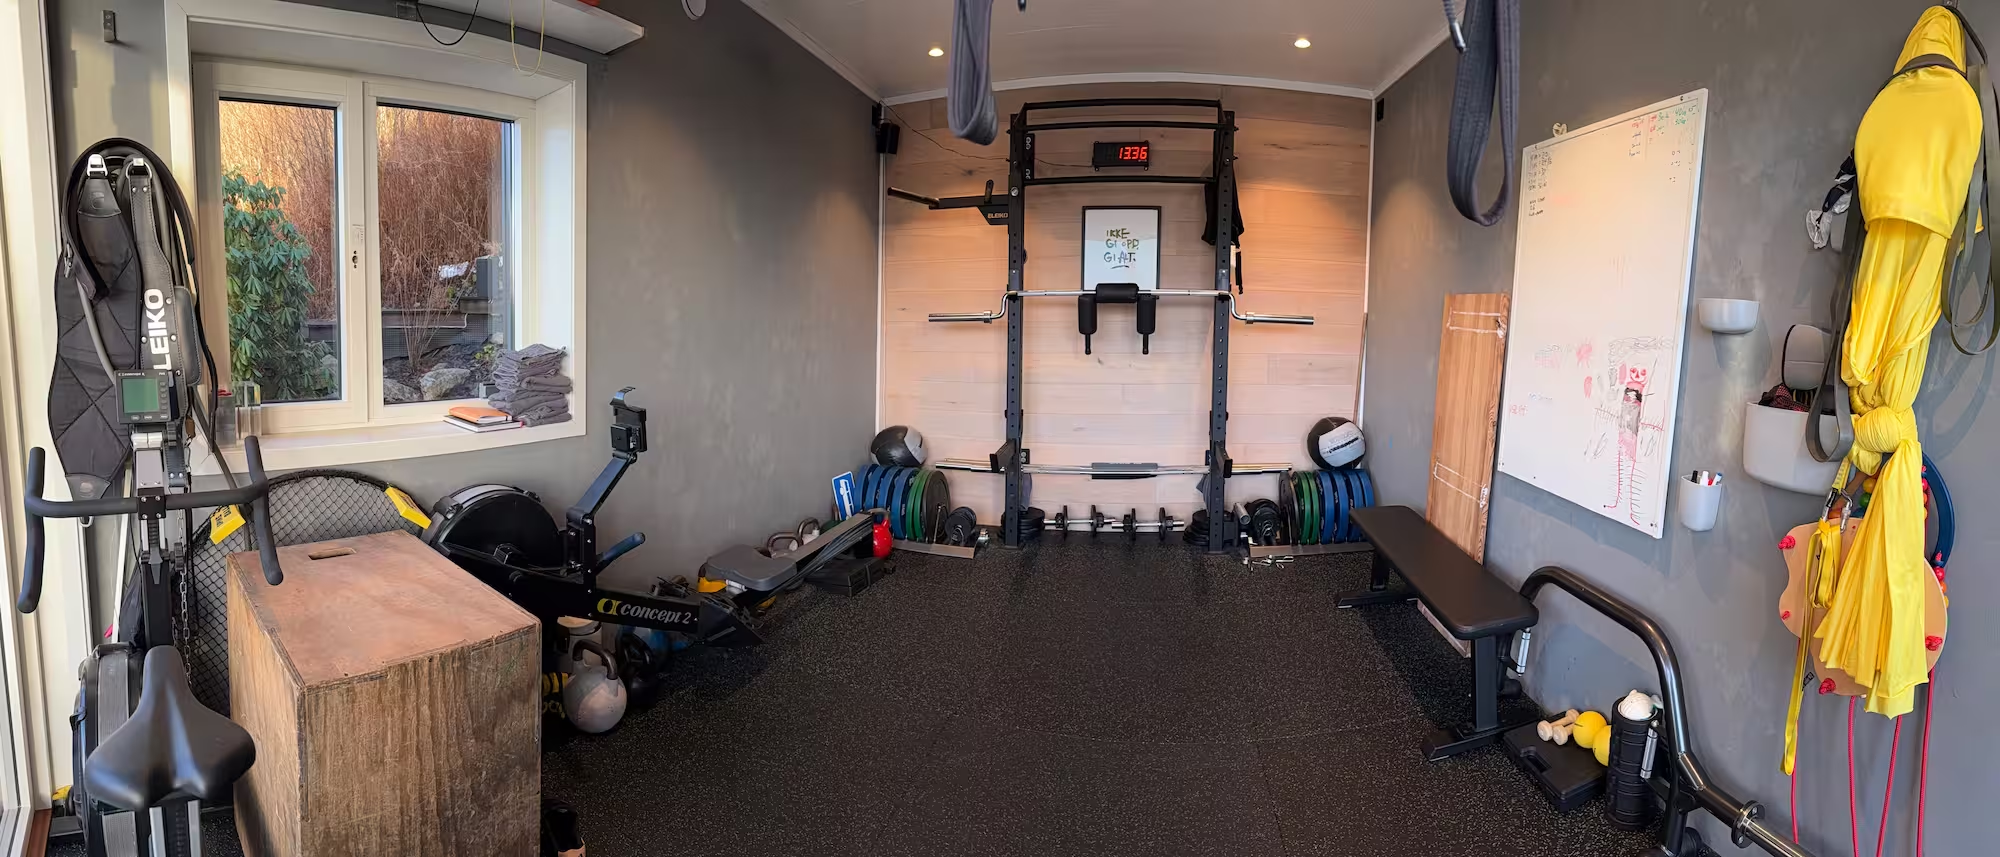
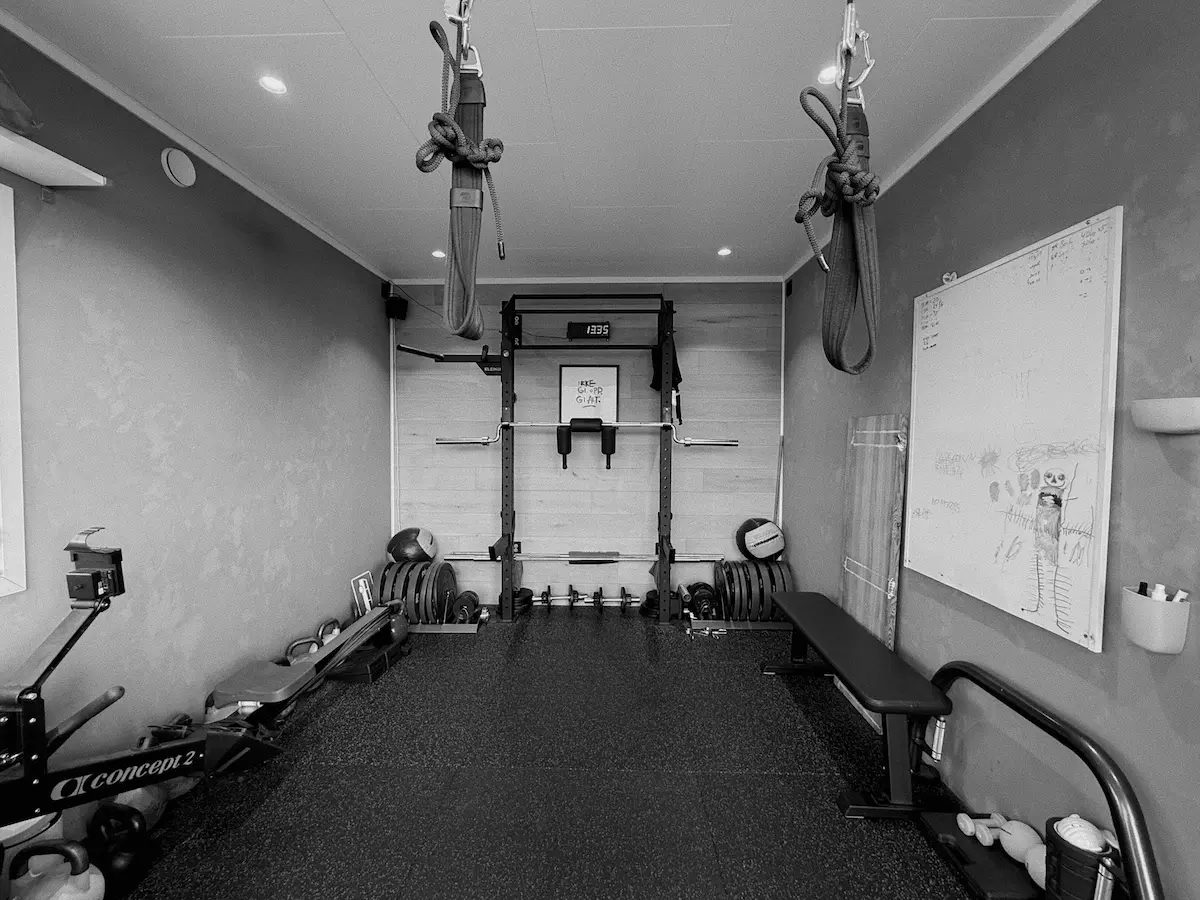
Once the space was ready, I approached equipment selection like a chef stocking their dream kitchen. The centerpiece being a squat rack that could handle anything I threw at it, complete with built-in pull-up and dip bars. I added carefully chosen barbells and dumbbells, each with its purpose, from an Olympic bar to hex-bar for deadlifts to a lighter weightlifting bar for my wife.
But the heart of the gym isn’t the expensive equipment—it’s the little touches that make it uniquely mine. The suspension system that doubles as monkey bars for my kids (and a worn-out tissue gifted from Erika). The whiteboard that’s equal parts workout tracker and my children’s art gallery. The Sonos speaker that’s probably played more Disney soundtracks during family workout sessions than pump-up playlists. Even my Concept2 rower has become more than just cardio equipment—my kids love playing the built-in fishing game on the monitor while I get my workout in, turning a serious piece of fitness equipment into something the whole family enjoys.
The crown jewel of the space? A sliding wall that opens to the outdoors—an idea born from those cramped bedroom gym days when I dreamed of fresh air. Now, on sunny mornings, I roll it open and let the outside in, creating a training space that feels more like a zen garden than a traditional gym.
The Perks of a Home Gym
The benefits of a home gym have far exceeded my expectations. Let’s talk numbers first: A gym membership in Norway runs about $80 per month per person. Over eight years, my wife and I would have spent roughly $15,000 on commercial gym memberships. I’ve invested about that same amount in my home gym equipment—primarily high-end Eleiko gear that will last a lifetime. So while the upfront costs were significant, the long-term math works out in favor of the home gym, especially considering the equipment’s resale value and durability.
But the real returns go far beyond the financial calculation. Beyond the obvious perks — no commute, no waiting for equipment — the magic is in the freedom to train exactly how I want. I can superset deadlifts with pull-ups without getting death stares from other gym-goers, and what used to take me 90 minutes at a commercial gym now takes just 45 minutes at home since I’m not walking between stations or waiting for equipment to free up. I also can grunt, drop weights, or workout shirtless without worrying about gym etiquette or making anyone uncomfortable.
But perhaps the most unexpected joy has been watching our home gym evolve into a family space. While I’m working through my sets, the kids often hang out there too—turning the suspension straps into makeshift swings, creating slides from the bench, or just being curious about what dad’s up to. It’s become this wonderful blend of serious training and playful family time. Sometimes they even join in with their own tiny “workouts,” which usually involve mimicking my movements with a broom or very light weights. The kids now see fitness as a natural part of daily life, not some chore dad does in a faraway building. It’s teaching them early on that staying active can be both fun and a natural part of daily life.

The never-ending project
Every home gym owner knows the perpetual itch to upgrade—that constant mental wishlist of “what if” additions. But after eight years of building this space, I’ve learned something crucial: the best equipment isn’t always the newest or most expensive—it’s what you’ll actually use consistently. Sure, I still catch myself browsing adjustable dumbbells online at 2 AM, or sketching plans for a custom cable system. I’ve even measured the perfect spot for a treadmill about dozen times. But I’ve learned to sit with these impulses rather than act on them immediately.
The truth is, my current setup already delivers everything I need for effective training. These “dream additions” are just that: dreams that are fun to entertain but not essential to my progress. It’s a lesson that took years to learn: sometimes the best upgrade isn’t new equipment at all, but finding a creative new way to use what you already have.
Top Tips for Anyone Building a Home Gym
Here’s what I wish I’d known from the start:
1. Buy Quality Equipment
“Buy once, cry once.” Cheap equipment will frustrate you and waste your money in the long run. I’ve never regretted investing in high-quality gear, and some of my equipment will likely outlive me. Most of my equipment is from Eleiko - one of the premier producers of strength training equipment in the world. Their reputation for quality is well-earned, and while the initial investment was significant, the durability and performance have more than justified the cost. My experience training in various CrossFit gyms taught me early on to recognize quality equipment, which helped inform my purchases. In fact, the only equipment I’ve ever sold was that first wobbly squat rack, and ironically, I got more for it used than I paid new.
2. Have a Training Program
Don’t just wing it. Following a program keeps your workouts intentional and progressive. For years, my go-to has been Chalk programs — they’re effective and flexible enough to prevent boredom. Other great options are Garage Gym Athlete and Functional Bodybuilding, both of which cater to home gym setups. Switching up programs once in a while keeps things fresh and ensures you don’t plateau or get too bored.
3. Upgrade Gradually
Remember that spare bedroom setup? I started with just a barbell, plates, and determination. Each addition came from a real need discovered through training, not from a preconceived shopping list. When I finally added a rowing machine six months in, it wasn’t because it was on some “essential equipment” list—it was because I needed some kind of cardio as well. This gradual evolution meant every piece of equipment had purpose and got used regularly.
4. Build for Your Style of Training
Design your gym to align with your workouts. If you love cardio, prioritize machines like the rower, bike or treadmill. If strength is your focus, invest more in weights and racks.
5. Use Your Space Wisely
Storage solutions like wall-mounted racks and hooks aren’t just for organization—they’re space-saving essentials. My golden rule is that every piece of equipment has to earn its floor space. If something can be mounted on a wall, it should be: plate storage, bands, ropes, and even racks. I’ve mounted as much as possible to the wall, leaving the precious floor space for movement and training. Think of floor space as premium real estate—if equipment isn’t actively being used, it shouldn’t be taking up valuable floor space. This mindset has helped me create a surprisingly spacious training area even in what others might consider a tight space (only 15 square meters)
Coming Full Circle
Eight years ago, I started with a simple barbell in a spare bedroom. Today, I train in a custom-built space with heated flooring that I literally dug out of a hillside. Your path won’t look exactly like mine. And it shouldn’t! The six months I spent digging with a shovel and wheelbarrow might seem extreme (my wife certainly thought so), but that’s the beauty of building your own gym: it becomes a reflection of your commitment and creativity. Some people convert their garage, others transform a basement, and yes, some of us dig into hillsides. But through all of this, I’ve learned something fundamental: the best home gym isn’t the one with the most equipment or the fanciest setup. It’s the one that gets used!
